Using the Message Center
Overview - The Message Center function allows a user to send, view, and delete messages. User may be providers or Conduent and DHCF staff members. Providers may use the message center to view communications from DHCF and Conduent and to send messages to DHCF and Conduent. DHCF and Conduent staff members may use the message center to communicate with providers and each other.
Using the Message Center: Web Page Image
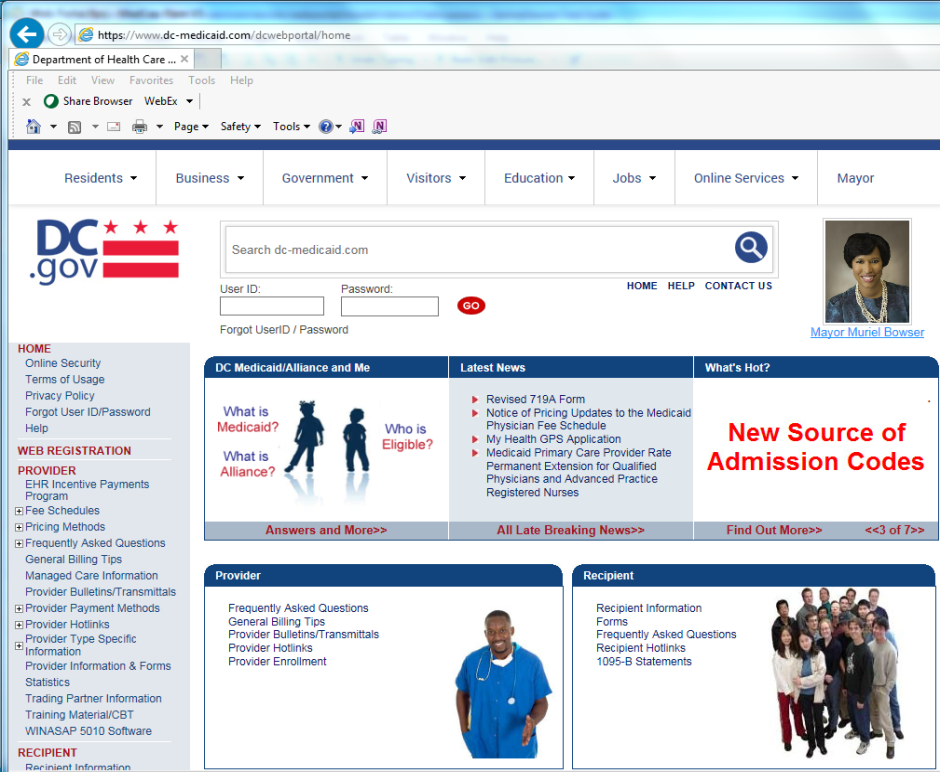
Figure 138: Home Page – Login Web Page Image
Using the Message Center: Web Page Details
- From the Home Page, the user should log into the web portal with their User ID and password. This will give the user access to the secure functions.
Sending Messages: Web Page Details
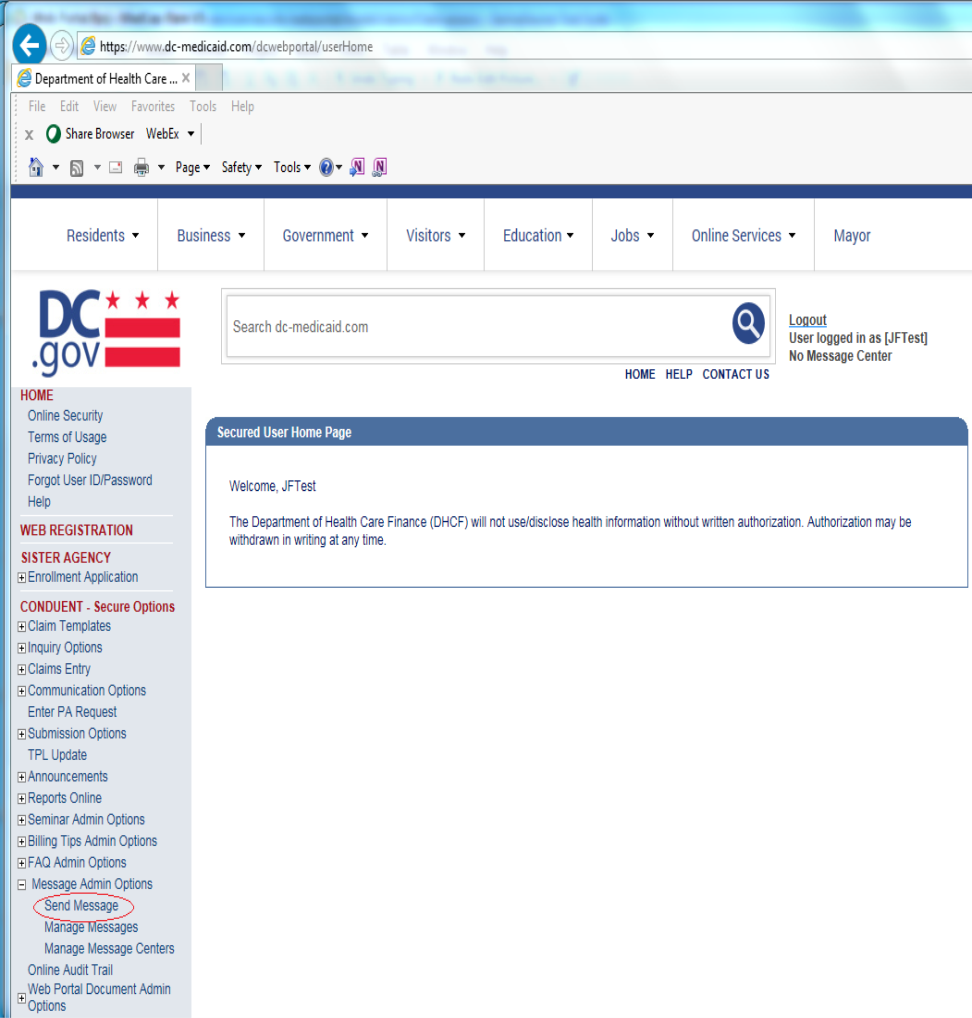
- The user should click the "+" symbol for Message Admin Options on the left navigation bar to expand the message options. Then, the user should click Send Message.
- The web portal displays the Send Message web page.
Figure 139: Home Page – Send Message Web Page Image
- The Send Message web page will be displayed. The user may enter a subject and text, as well as upload a document to be attached to the message.
Figure 140: Send Message Web Page Image
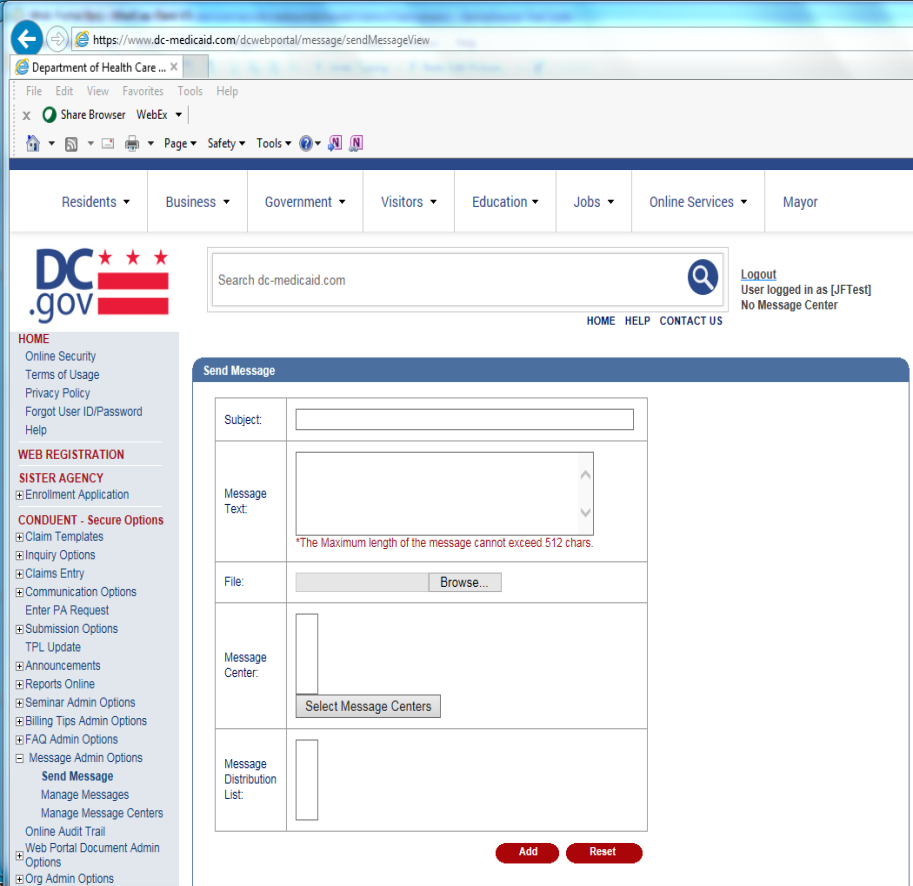
- The user should choose the message center and/or the message distribution list to which the message should be sent.
- The user should upload any attachments and click Add. The user will receive a confirmation message, "Message Sent Successfully", following submission of the message.
Viewing Messages: Web Page Details
- From the Home Page, the user should click the "+" symbol for Message Admin Options on the left navigation bar to expand the message options. Then, the user should click Manage Messages.
- The web portal displays the Manage Messages web page.
Figure 141: Manage Message Web Page Image

- The user will be shown a list of all the messages currently in their message center. To view the message text, the user should click View beside a message. The Message Text web page will be displayed.
Figure 142: Message Text Web Page Image
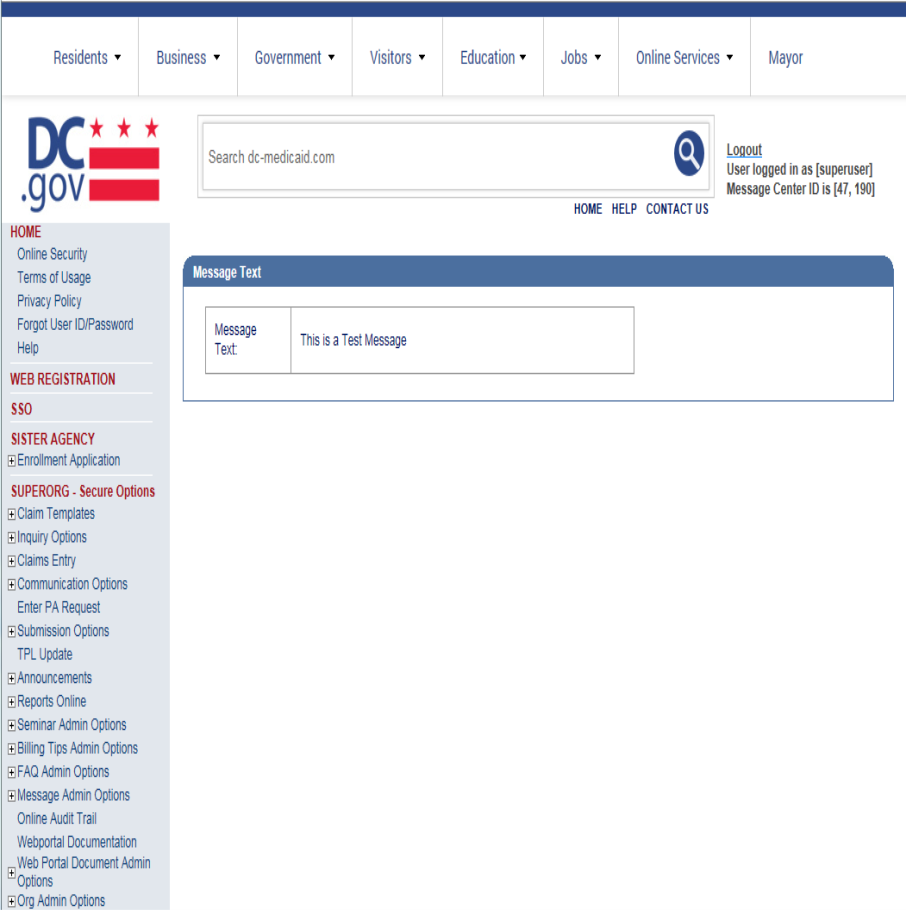
- If there is an attached file in the message, a link to the attachment will be shown. The user should click the link to open a new window that will allow the user to open or save the file.
Delete Message: Web Page Image
Figure 143: Delete Message Web Page Image
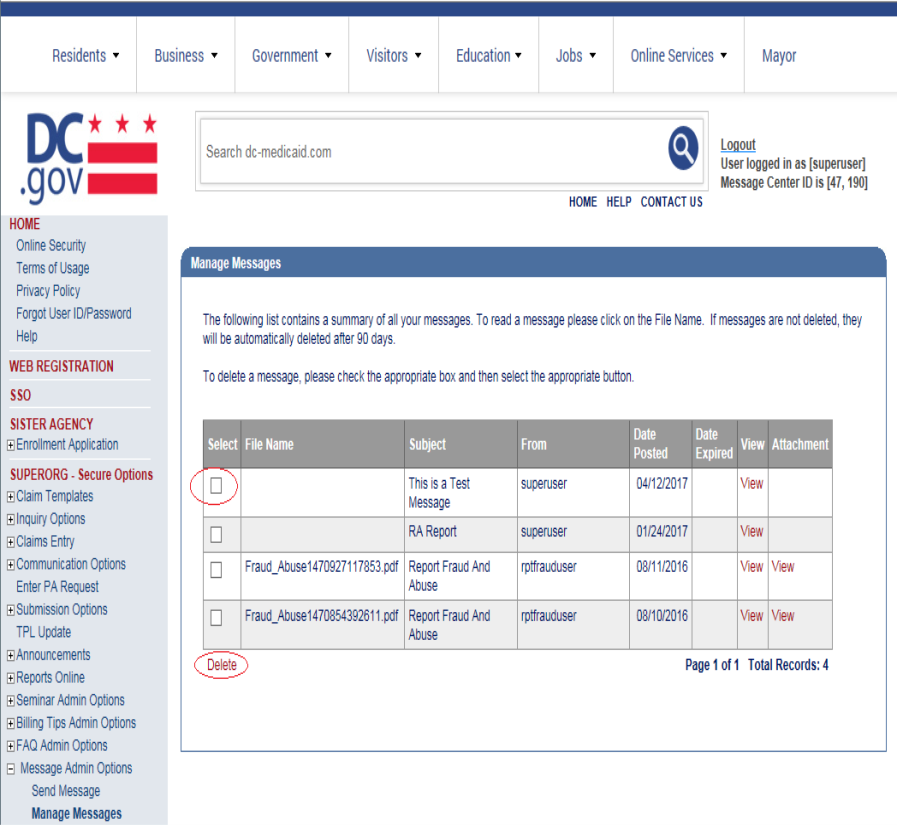
Delete Message: Web Page Details
- From the Home Page, the user should click the "+" symbol for Message Admin Options on the left navigation bar to expand the message options.
- Then, the user should click Manage Messages.
- The web portal displays the Manage Messages web page. To delete a message, the user should click the check box under Select next to the message to delete. Then, the user should click Delete to remove the message.
- The user will receive a confirmation message "Message(s) deleted successfully" following deletion of the message(s).
Adding New Message Centers Image
Figure 144: Home Page – Manage Message Centers Web Page Image

Adding New Message Centers Details
- From the Home Page, the user should click the "+" symbol for Message Admin Options on the left navigation bar to expand the message options.
- Then, the user should click Manage Message Centers.
Manage Message Centers (Add): Web Page Image
Figure 145: Manage Message Centers (Add) Web Page Image
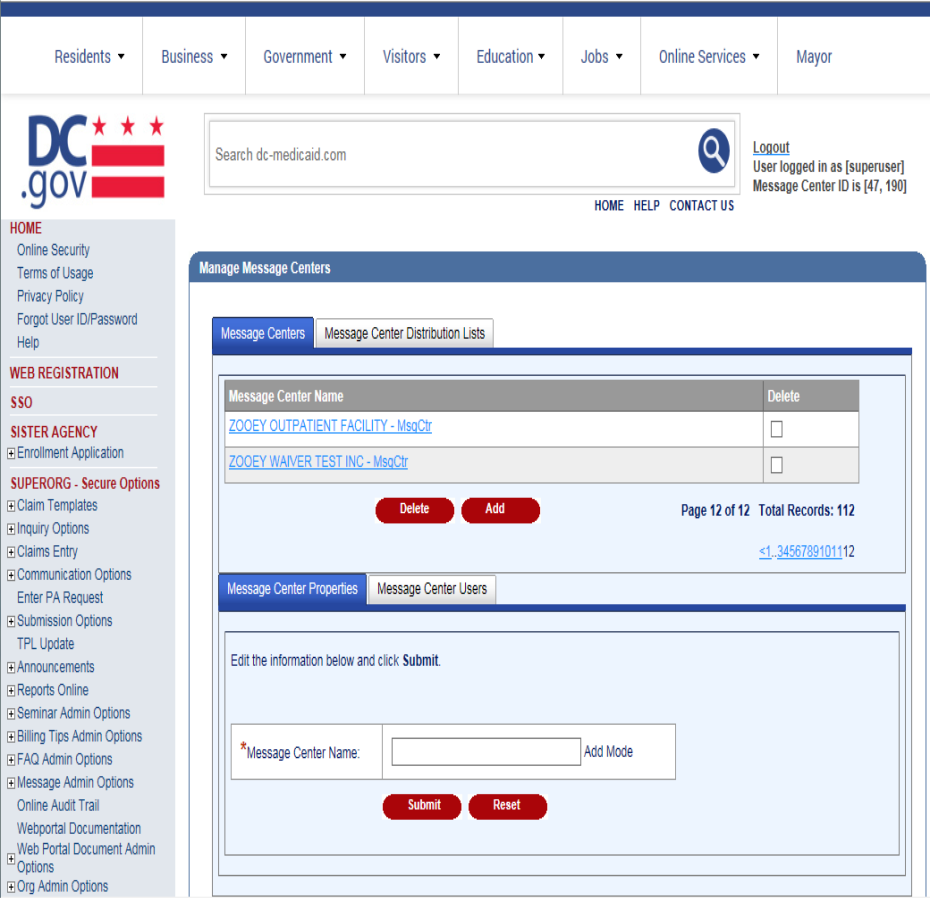
Manage Message Centers (Add): Web Page Details
- The Manage Message Centers web page will display. The user may add a new message center by entering the name in the Message Center Name field and clicking Submit.
- A confirmation message, "Message Center added successfully", will be displayed at the top of the web page.
Editing Message Centers: Web Page Image
Figure 146: Manage Message Centers (Edit) Web Page Image
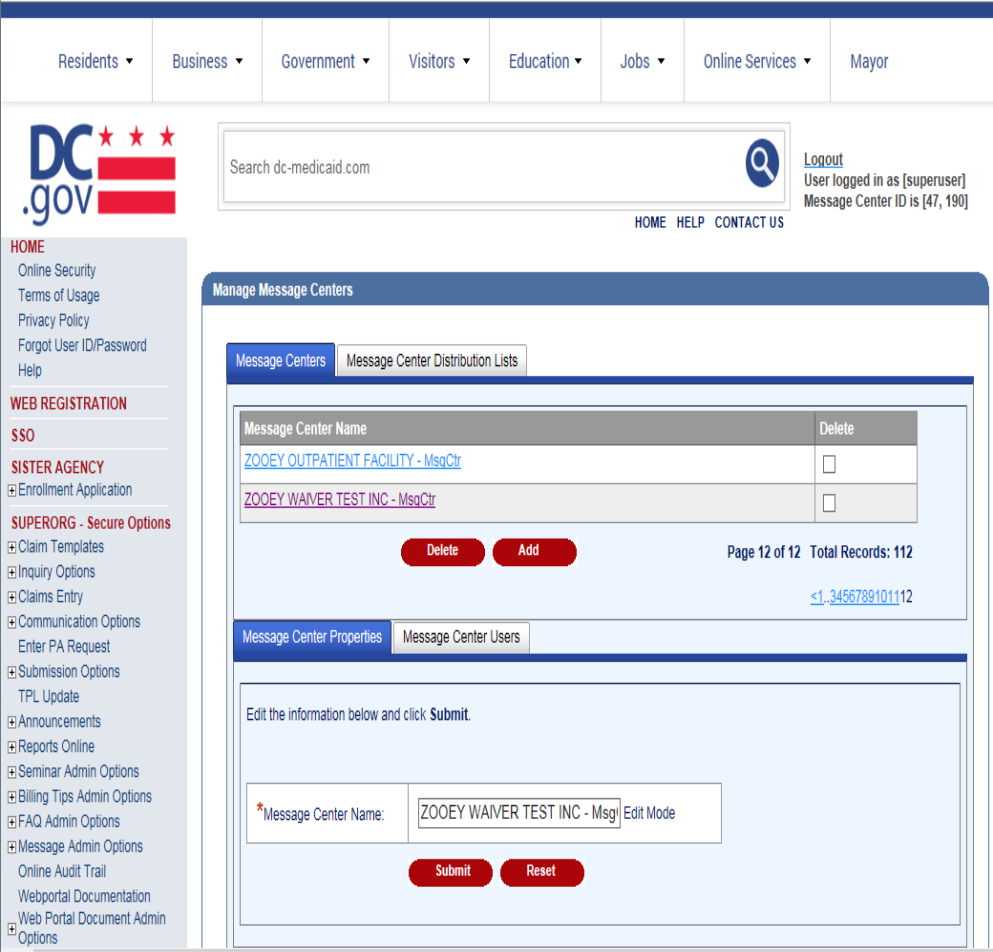
Editing Message Centers: Web Page Details
- To edit the name of an existing message center, the user should click on the message center they wish to update. The message center name will appear in the Message Center Name field under Message Center Properties.
- The user should update the name of the message center and click Submit.
- A confirmation message, "Message Center updated successfully.", will be displayed at the top of the web page.
Manage Message Centers (Edit): Web Page Image
Figure 147: Manage Message Centers (Edit) Web Page Image
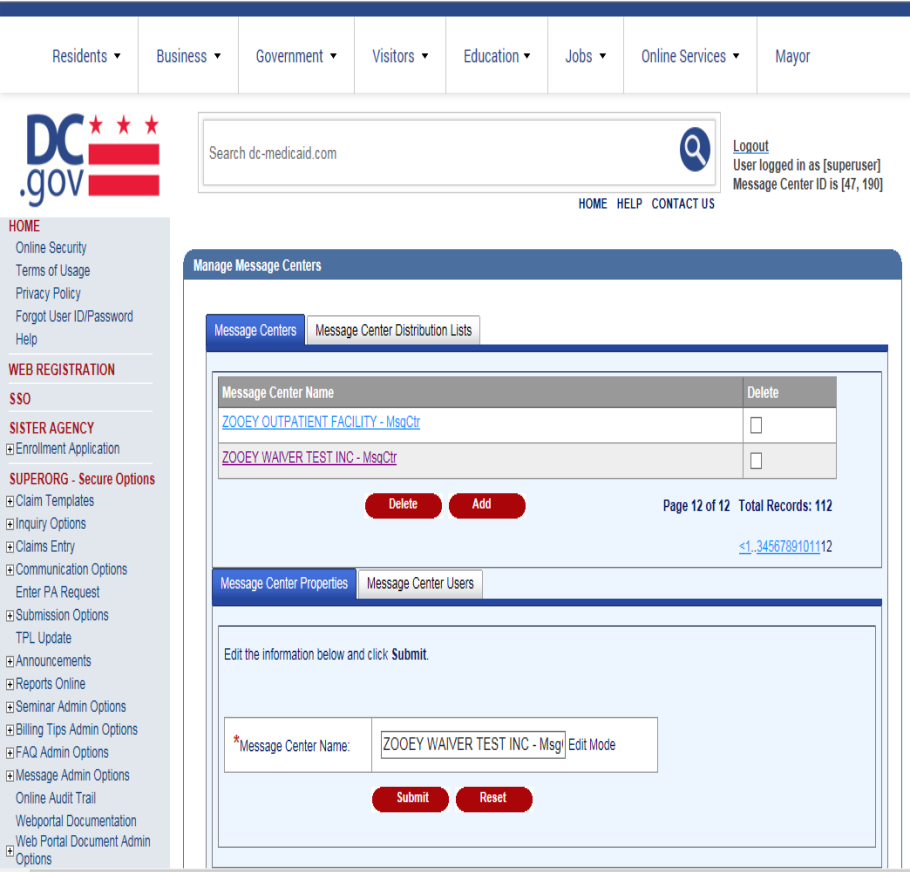
Manage Message Centers (Edit): Web Page Details
- To edit the users assigned to a message center, the user should click on the message center they wish to update.
- The user should click Message Center Users to display the list of unassigned and assigned users.
Figure 148: Manage Message Centers (Edit Users) Web Page Image
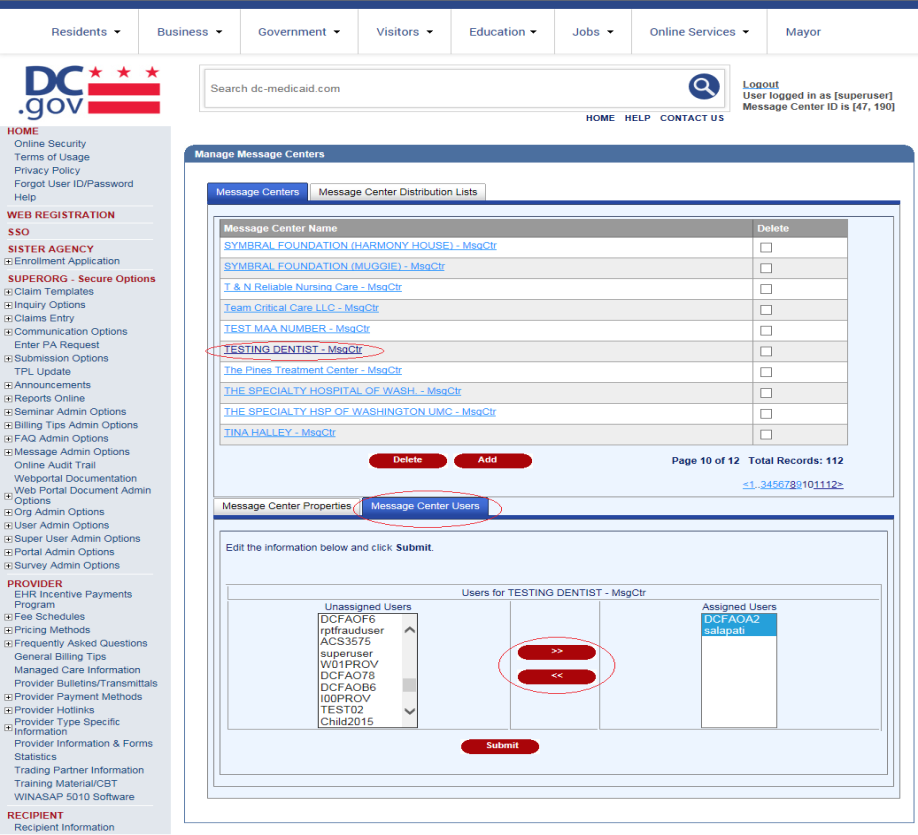
- The user should use the arrows to add and/or remove users from a message center.
- The user should click the Submit.
- The user will be asked to confirm the update in a small window displayed in the middle of the web page. The user should click OK to proceed.
Manage Message Centers (Edit Users): Web Page Image
Figure 149: Manage Message Centers (Delete) Web Page Image
Manage Message Centers (Edit Users): Web Page Details
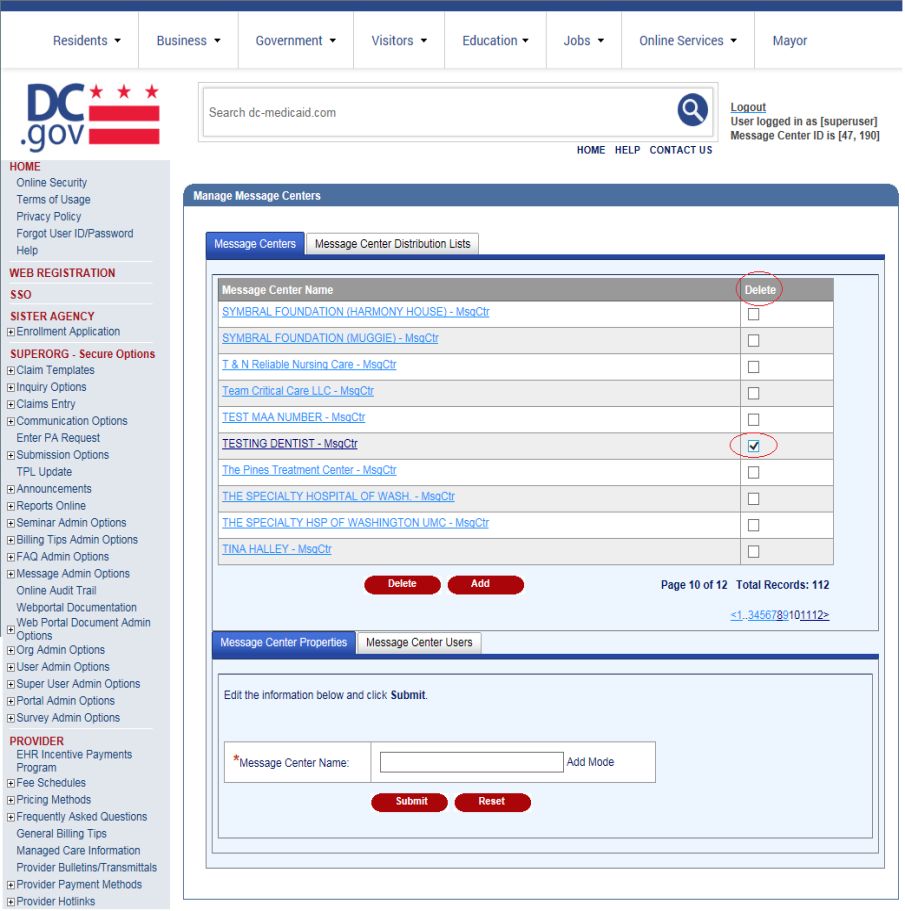
- To delete an existing message center, the user should check the box under the Remove column next to the message center(s) he/she wishes to delete.
- The user should click the Remove button.
- The user will be asked to confirm the deletion in a small window displayed in the middle of the web page. The user should click OK to proceed with the deletion or Cancel.
- A confirmation message, "Message Center(s) removed successfully", will be displayed at the top of the web page.
- The user should update the name of the message center and click Submit.
- A confirmation message, "Message Center updated successfully.", will be displayed at the top of the web page.
Manage Message Centers (Add Message Distribution List): Web Page Image
Figure 150: Manage Message Centers (Add Message Distribution List) Web Page Image 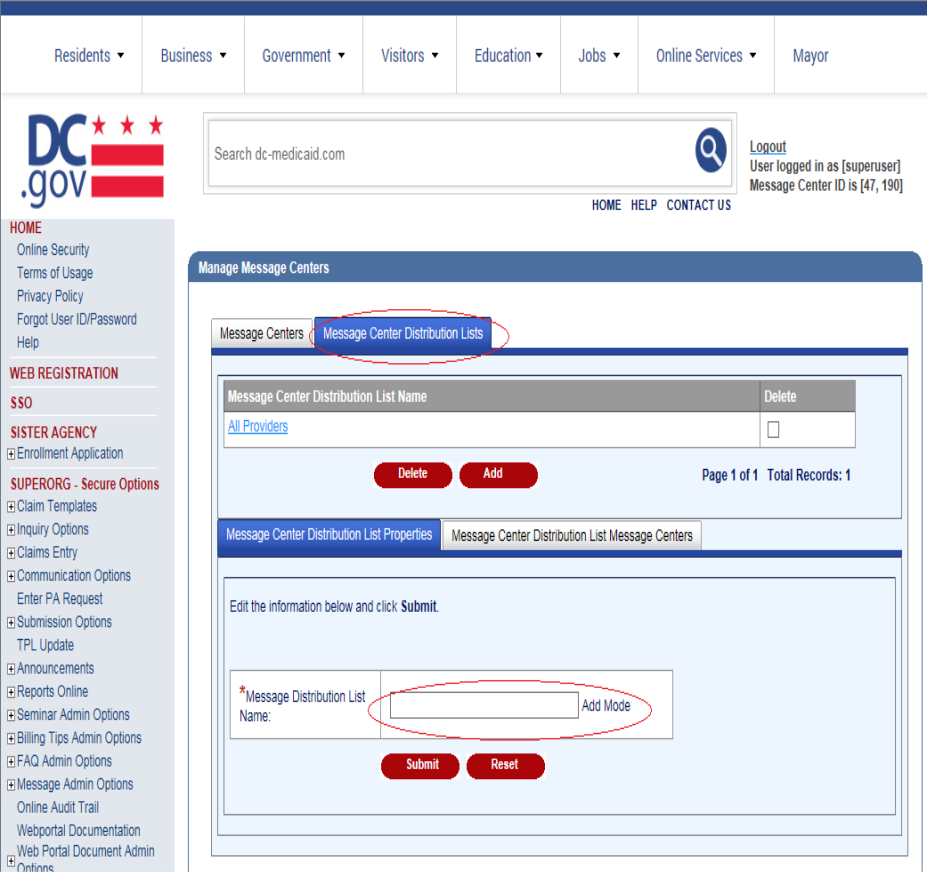
Manage Message Centers (Add Message Distribution List): Web Page Details
- From the Manage Message Center page, the user should click the Message Center Distribution Lists tab in order to access the distribution list functions.
- The user should enter the name of the new message distribution list in the Message Distribution List Name field and click Submit.
- A confirmation message, "Message Center Distribution List added successfully.", will be displayed at the top of the web page.
Manage Message Centers (Edit Message Distribution List): Web Page Image
Figure 151: Manage Message Centers (Edit Message Distribution List) Web Page Image
Manage Message Centers (Edit Message Distribution List): Web Page Details
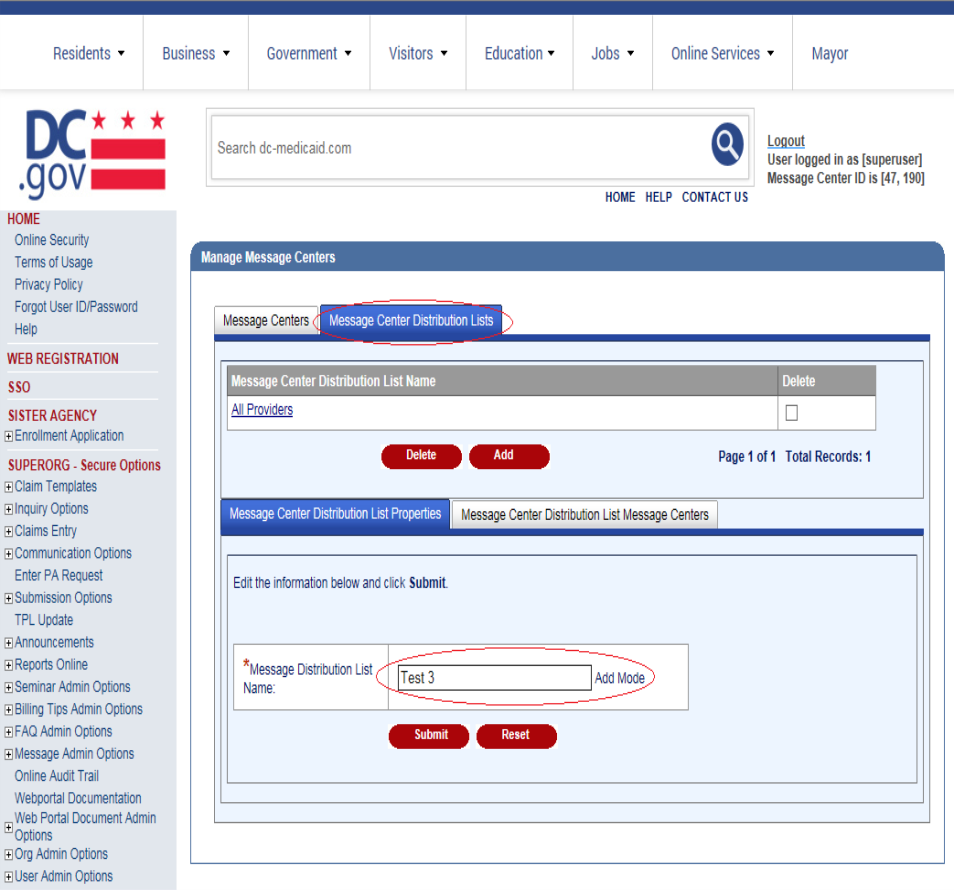
- To edit the name of an existing message distribution list, the user should click on the message distribution list that he/she wishes to update. The message distribution list name will appear in the Message Distribution List Name field under Message Distribution List Properties.
- The user should update the name of the message distribution list and click Submit.
- A confirmation message, "Message Center Distribution List updated successfully.", will be displayed at the top of the web page.
Manage Message Centers (Edit Message Centers): Web Page Image
Figure 152: Manage Message Centers (Edit Message Centers) Web Page Image
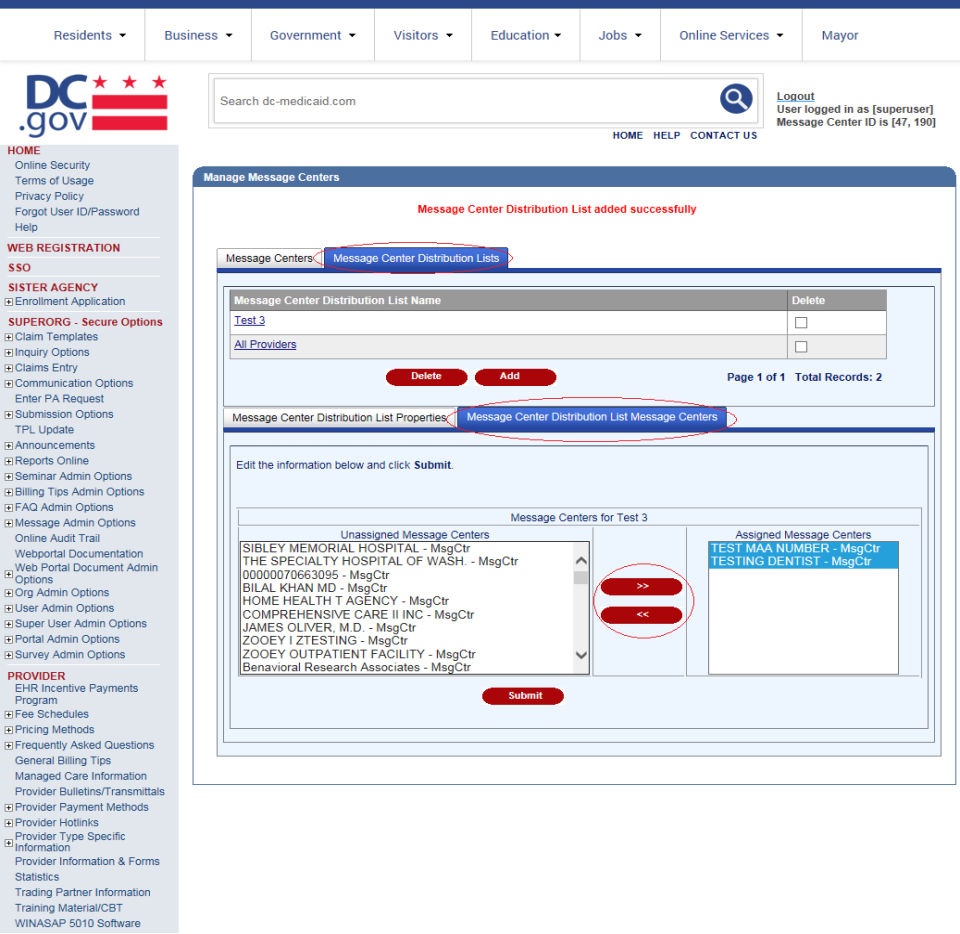
Manage Message Centers (Edit Message Centers): Web Page Details
- To edit the centers assigned to a message distribution list, the user should click on the message distribution list he/she wishes to update.
- The user should click Message Center Distribution List Message Centers to display the list of unassigned and assigned message centers.
- The user should use the arrows to add and/or remove message centers from a message distribution list.
- The user should click the Submit.
- The user will be asked to confirm the update in a small window displayed in the middle of the web page. The user should click OK to proceed.
Manage Message Centers (Delete Distribution List): Web Page Image
Figure 153: Manage Message Centers (Delete Distribution List) Web Page Image
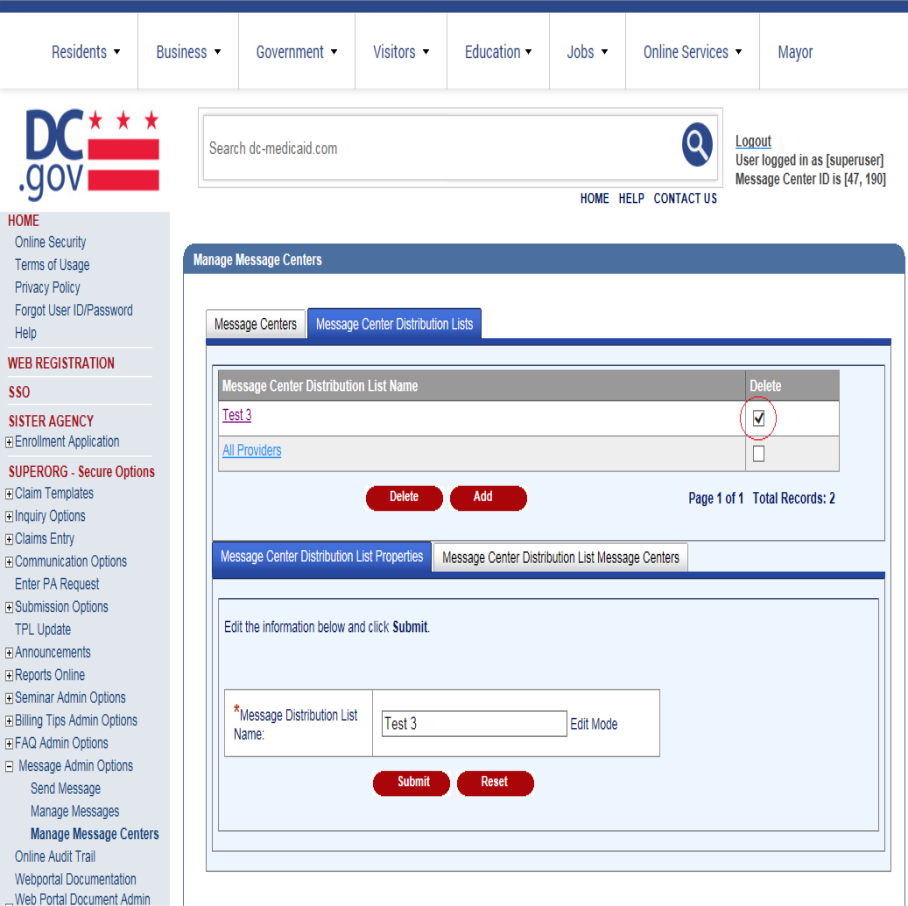
Manage Message Centers (Delete Distribution List): Web Page Details
- To delete an existing message distribution list, the user should check the box under the Remove column next to the message distribution list(s) he/she wishes to delete.
- The user should click the Remove button.
- The user will be asked to confirm the deletion in a small window displayed in the middle of the web page. The user should click OK to proceed with the deletion or Cancel.
- A confirmation message, "Message Distribution List(s) removed successfully.", will be displayed at the top of the web page.